Recently, during one of our team calls, a colleague messaged me: “How does Zoom work?”At first, it felt odd. I assumed everyone knew their way around Zoom by now, given how universal it has become. Turns out, I was wrong. Many people, especially the tech-shy, still find Zoom tricky to navigate.
That’s exactly why I compiled this guide.
In this article, I’ll show you how to cut through tech hurdles and master Zoom’s features. Whether you’re joining your very first call or exploring Zoom’s latest AI tools, this guide has you covered.
What is Zoom?
Zoom is a cloud-based video conferencing platform that lets people connect through video, audio, chat, and webinars. It’s widely used for virtual meetings, remote work, online learning, and even social hangouts.
The platform offers key collaboration features such as screen sharing, breakout rooms, recording, virtual backgrounds, and AI-powered tools. Its excellent suite of features makes it ideal for businesses, educators, teams, and individuals who need a simple, reliable way to communicate online.
Getting Started with Zoom
Getting started with Zoom is easy, but choosing a subscription tier that aligns with your workflows is crucial. Picking the right plan ensures you access the features your team truly needs. From small check-ins to large conferences, the right plan maximizes collaboration, streamlines workflows, and delivers better value for your budget.
Choose the right plan for your team
Finding the perfect fit for your team starts with understanding the Zoom plan and pricing. Explore our detailed Zoom pricing guide to make the best choice.
- Basic Plan: This free plan caps group meeting durations to 40 minutes and accommodates up to 100 participants. It includes a team group chat function, basic whiteboards, and limited collaboration tools like Docs and Tasks. It’s ideal for casual or occasional users who need simple video calls and messaging.
- Pro Plan: The Pro Plan is designed for teams of up to 99 members. It extends the meeting duration up to 30 hours and supports 100 participants (with options to increase). It also offers 10GB of Zoom cloud storage, unlimited Docs, AI-powered task management, custom avatars, and workflow automation. This plan is great if you have frequent and extensive meetings or require enhanced productivity tools.
- Business Plan: The Business Plan supports up to 300 participants and unlimited whiteboards for collaboration. It includes advanced scheduling, single sign-on (SSO), managed domains, and premium support. It is perfect for large organizations needing robust meeting management and enhanced security features.
- Enterprise plan: The Enterprise Plan supports up to 500 participants (expandable to 1,000 with Large Meetings add-on) and includes unlimited whiteboards, translated captions, and advanced webinar features. It offers premium support, single sign-on (SSO), managed domains, and cloud storage options. It is ideal for large organizations that require scalable communication, enhanced collaboration tools, and enterprise-grade security.
Signing up and creating a Zoom account
Getting started with Zoom video conferencing is fast and easy. Simply follow these step-by-step instructions to sign up, install the Zoom app, and start using it on your devices.
Step 1: Sign up with Zoom
To get started with Zoom, head to their website and click on the “Sign up free” button at the top-right corner of the screen. Alternatively, open the Zoom pricing page, select your preferred plan, and follow along with the signup wizard.
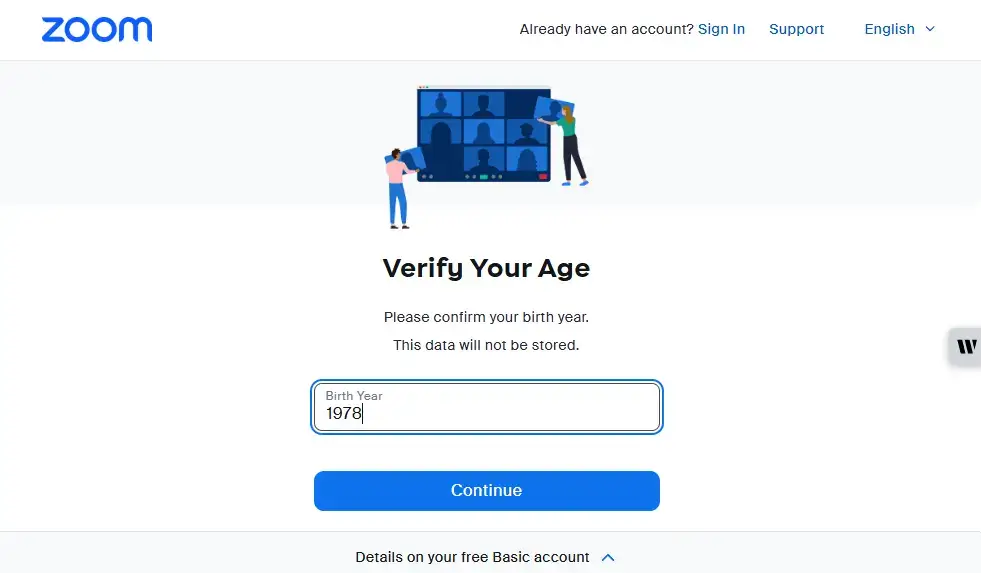
Step 2: Confirm your age
When prompted, enter your birth year to confirm your age. Click “Continue” to proceed with the signup process. The provider requires you to confirm your age because certain regulations in the United States prohibit individuals under 16 years old from creating Zoom accounts.
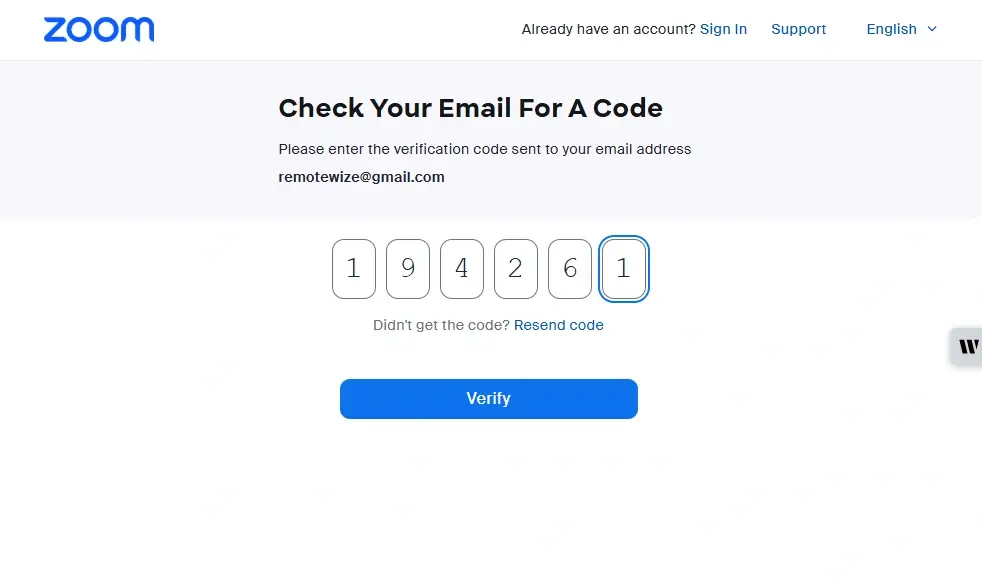
Step 3: Confirm your email
Enter your email address and click “Continue.” Then, wait for Zoom to send you an email with the six-digit confirmation code. Once you receive it, simply enter the code in the pop-up window and click “Verify” to confirm your email address.
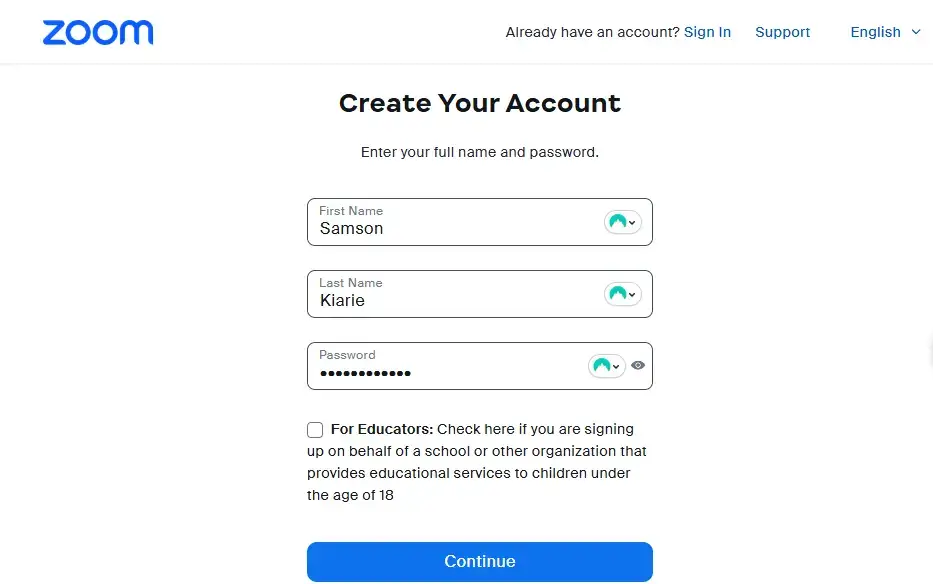
Step 4: Create your account
In the next window, add your name and meeting password to set up your account. If you’re creating an account on behalf of a learning institution that provides educational services to children under the age of 18, check the box “For Educators.” Click “Continue” to proceed.
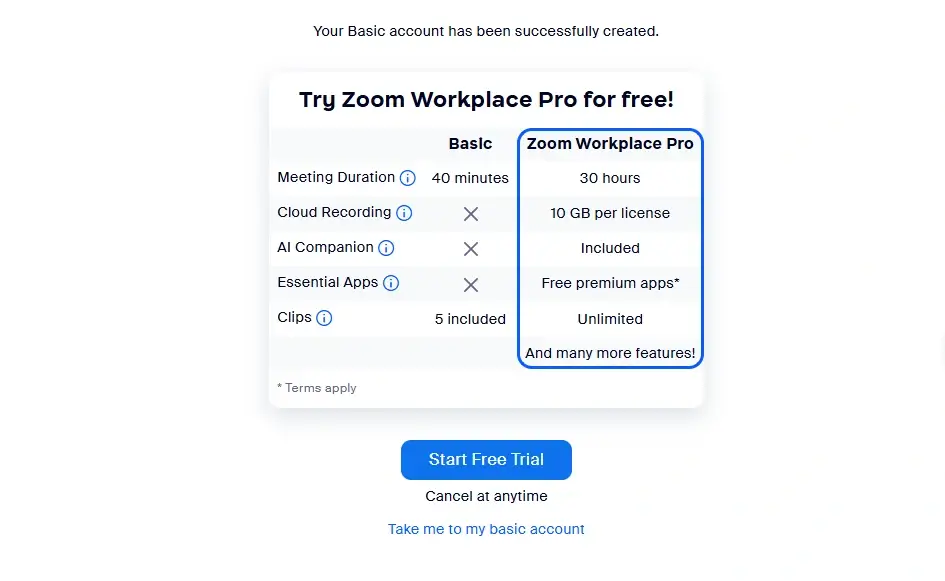
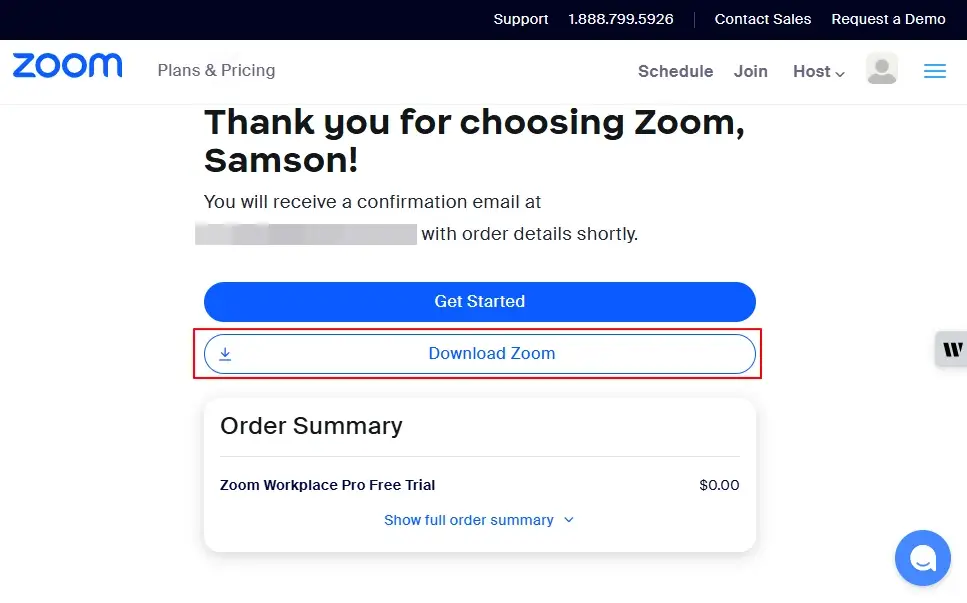
Step 5: Start a free trial
In the next window, select “Start Free Trial” to try Zoom Workplace Pro for free. Alternatively, click the “Take me to basic account” button if you want to use the Zoom Basic plan. Bear in mind that the free trial requires payment details.
Downloading and Installing Zoom
Once you’ve created your account, the next step is downloading and installing Zoom on your computer or mobile device. Remember that, unlike Google Meet, Zoom requires users to install the web or mobile app to use the core meeting functionality.
Install Zoom on desktop
For this step, I installed Zoom on a Windows computer. However, the steps are identical for Mac and Linux.
Step 1: Download Zoom on your desktop
Once you create your account, Zoom gives you the option to download Zoom for your device. I only needed to click “Download Zoom” to download the desktop client.
Alternatively, you may head over to the Zoom download center and download the desktop app.
Step 2: Install Zoom
Locate and double-click the Zoom installer file to install Zoom on your device. Zoom will automatically install and launch the desktop app. You can click “Sign In” to log into your account using the credentials created in the previous step.
Install Zoom on a mobile device
Alternatively, if you intend to use Zoom on your iOS or Android device, install the Zoom app from Google Play or Apple’s App Store. For this guide, I installed Zoom on my Android device.
Step 1: Find Zoom on the App Store
Head over to the respective app store, search “Zoom Workplace”
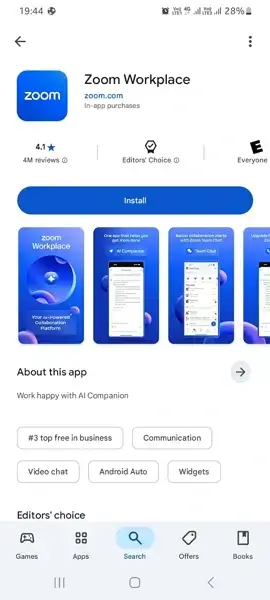
Step 2: Install Zoom on your mobile device
Tap “Install” to install Zoom on your mobile device. The process only takes a few minutes. Launch the app and log in using your credentials.

Setting up Zoom
Your account is ready, and the apps are on your computer or mobile device. Before you can schedule or join meetings, it’s recommended that you set up your profile. Here are some of the things you need to configure for a professional meeting:
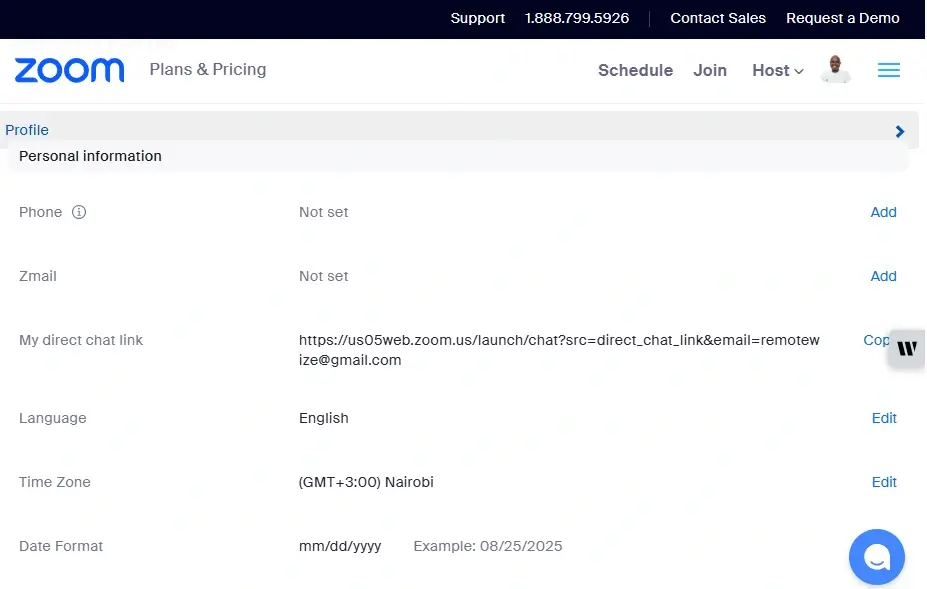
Step 1: Update your profile
Click the settings icon on the desktop app, and select “my profile”. This will take you to a page where you can upload a profile picture and configure the Zoom workplacedefault language, meeting ID, timezone, and date/time format.
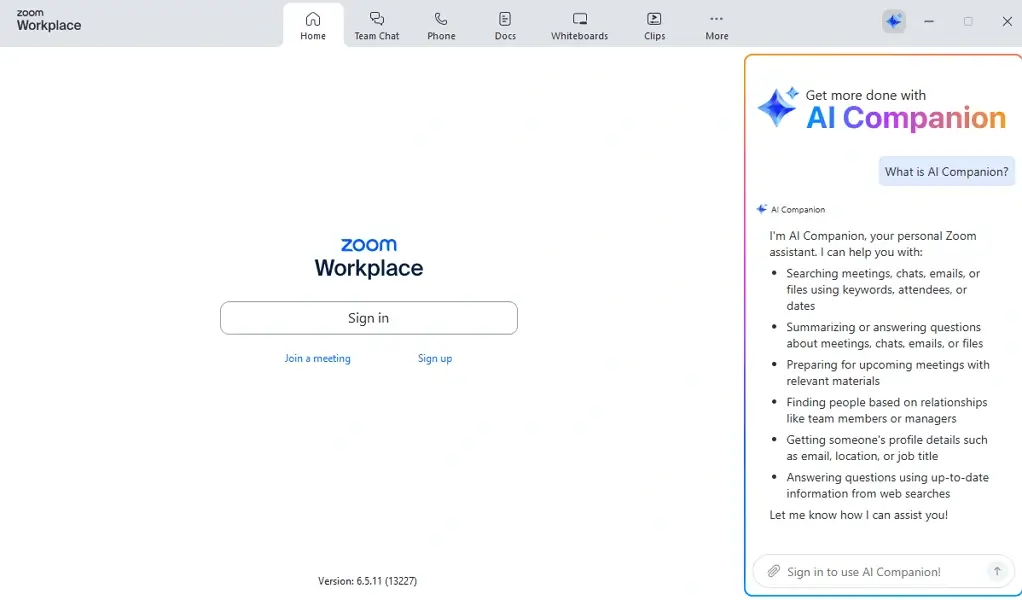
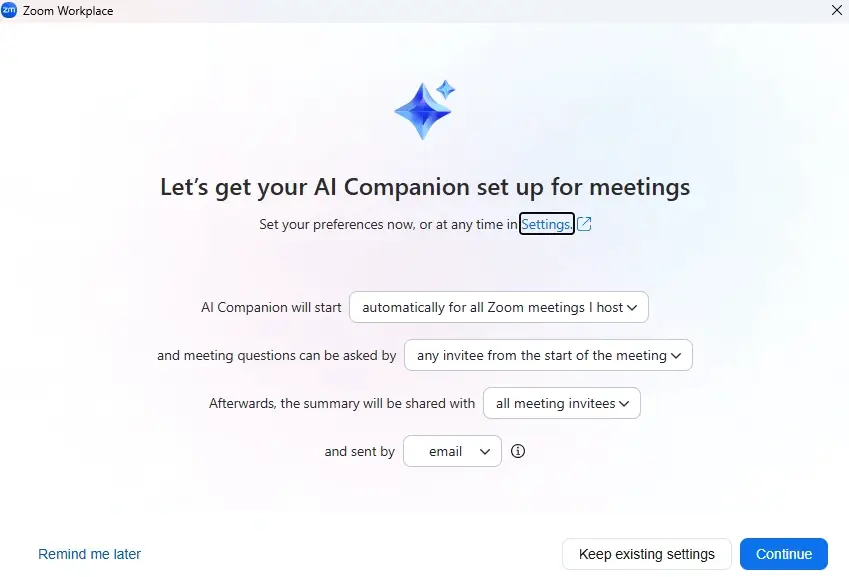
Step 2: Set up the AI companion
Zoom has advanced AI tools that enable you to get meeting summaries and transcripts automatically. When you log in for the first time on the desktop app, Zoom serves up a dialogue box with an option to set up these features. Click “Get Started” and follow along with the setup wizard to configure the AI options:
Step 3: Set up audio and video preferences
Zoom gives you plenty of audio conferencing and video customization options. You can adjust the default speaker and microphone volume, camera settings, virtual backgrounds, filters, and avatar. Simply open the settings pages and select “Audio” or “Video and Effects” to make Zoom truly your own.
Step 3: Configure notifications on the desktop app
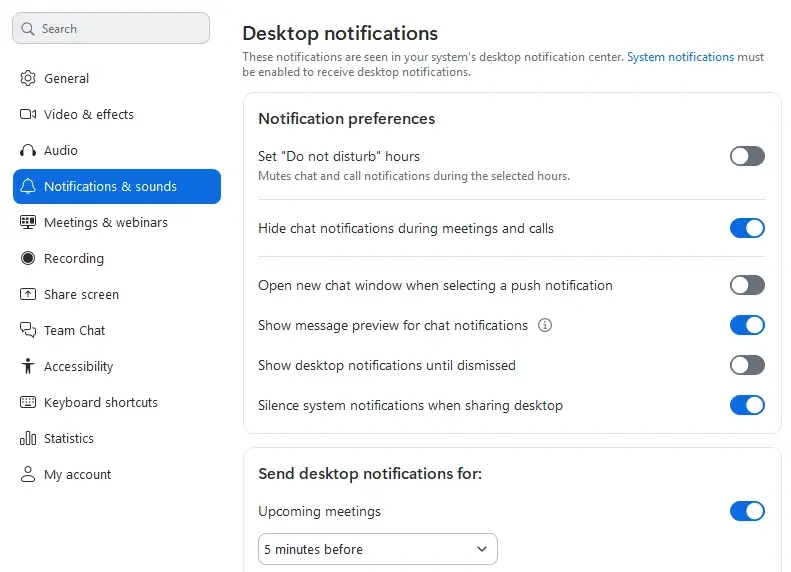
Zoom lets you set up notifications so that you never miss an important meeting. Click the settings icon on the desktop app and select “Notifications and Sounds.” Set your ringtones, “Do not disturb” preferences, and more to stay in the loop.
Step 4: Configure general settings
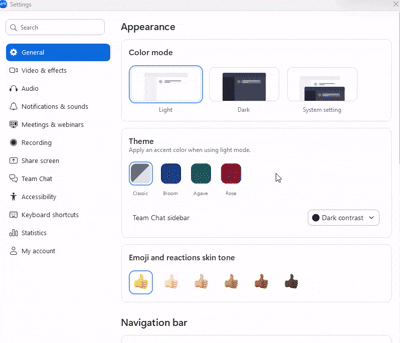
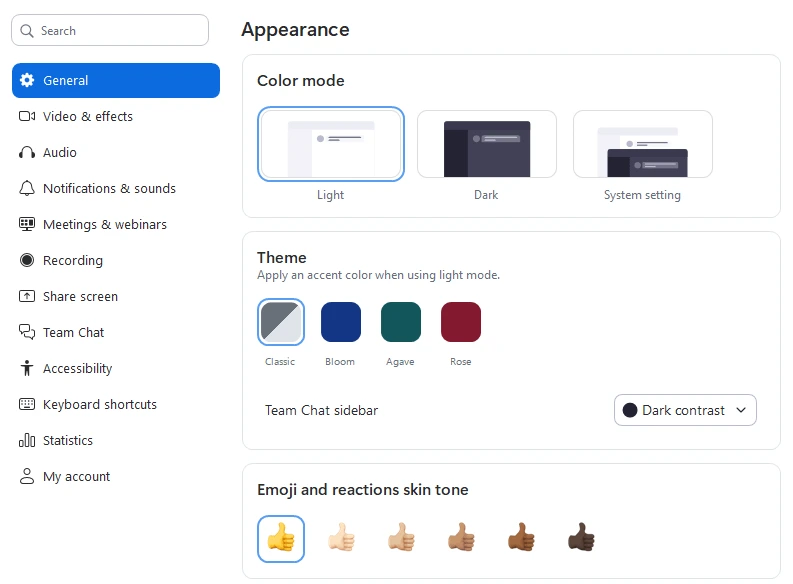
Click the settings icon on the desktop app and select “General.” Configure the theme, color mode, and emojis’ skin tone to suit your preferences.
How Does Zoom Work: Meeting Scheduling, Calling, Screen Sharing, and More
Zoom supports seamless meeting scheduling, high-quality calling, and robust collaboration to keep teams connected and productive. In this section, I’ll show you how to use Zoom to make virtual communication effortless and effective.
How to schedule a Zoom meeting
You can schedule Zoom meetings on desktop, mobile, or web apps. Scheduling a meeting is preferred when you want to plan, share invites, and ensure participants have the time blocked on their calendars.
For this review, I scheduled a meeting via the desktop app, which was a breeze.
Step 1: Sign in to your Zoom account
Launch the desktop app, and log in if you haven’t signed in already.
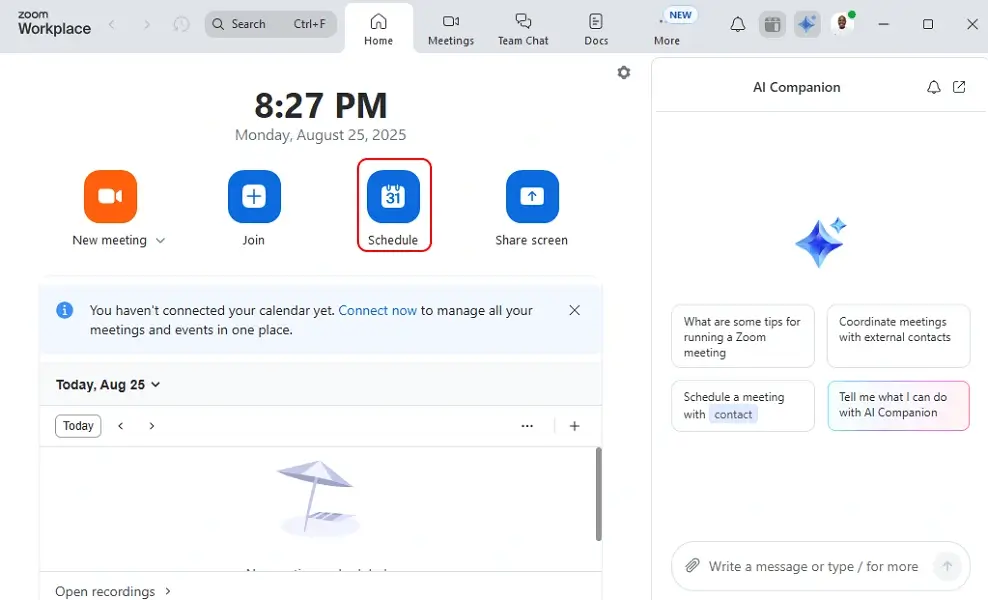
Step 2: Access the Schedule Meeting feature
On the Zoom dashboard, click the Schedule button (calendar icon).
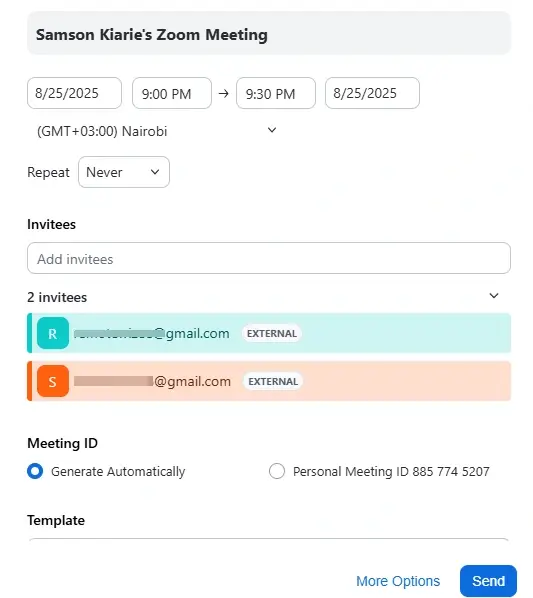
Step 3: Add meeting details
In the pop-up window, enter the meeting’s date and time, agenda, participants, and repeat cycle. The repeat tool lets you schedule recurring Zoom meetings, like weekly stand-ups, once and have them recur over a predefined period.
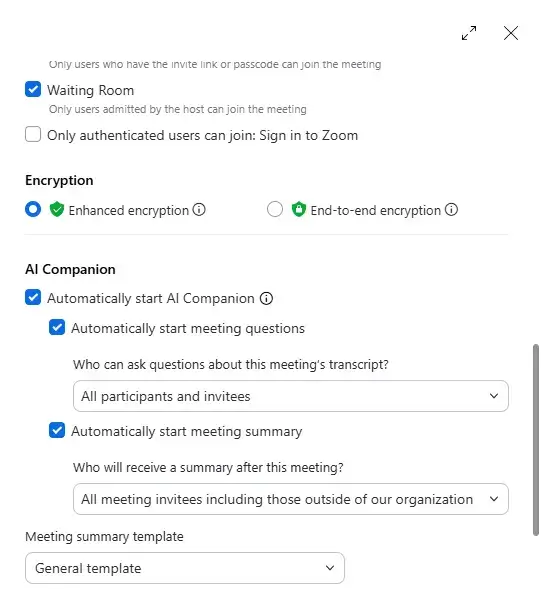
Step 4: Configure meeting security and AI features
Add a meeting passcode and activate a waiting Zoom room, and only authenticated users can join the meeting to enhance the meeting’s security. Zoom also lets you configure encryption and AI Companion options to ensure meetings are secure and effective.
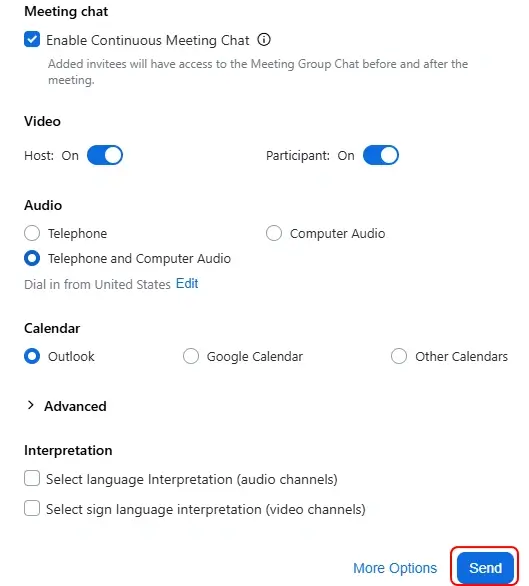
Step 5: Share the meeting
If everything is okay, click “Send” to schedule and share the meeting details with all participants.
How to start an instant meeting
Like other video conferencing tools, Zoom allows you to start instant meetings for events such as quick check-ins. Setting up an instant meeting is child’s play:
Step 1: Open Zoom app
Launch the Zoom app, and click the orange “New Meeting” button.
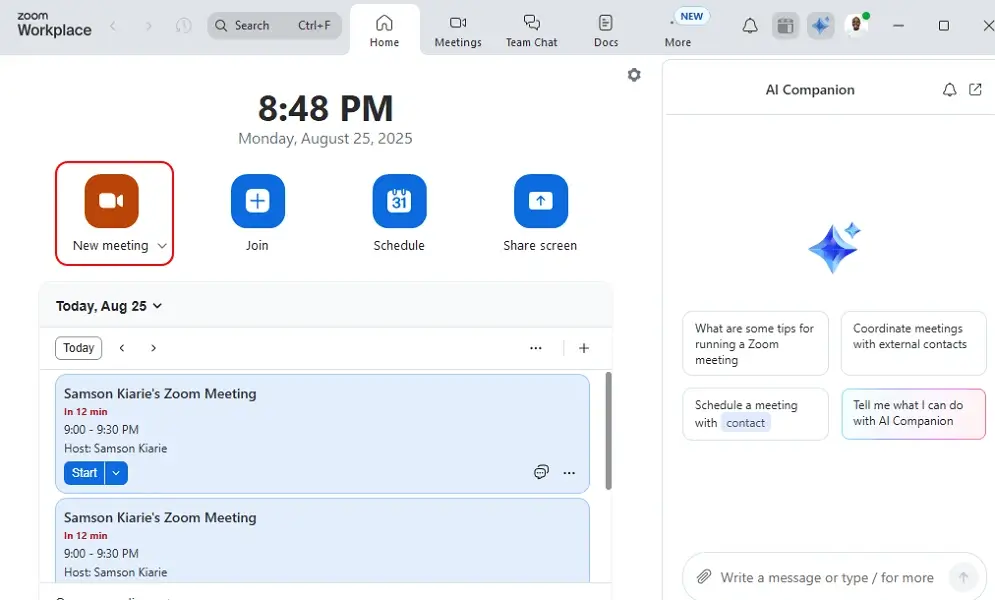
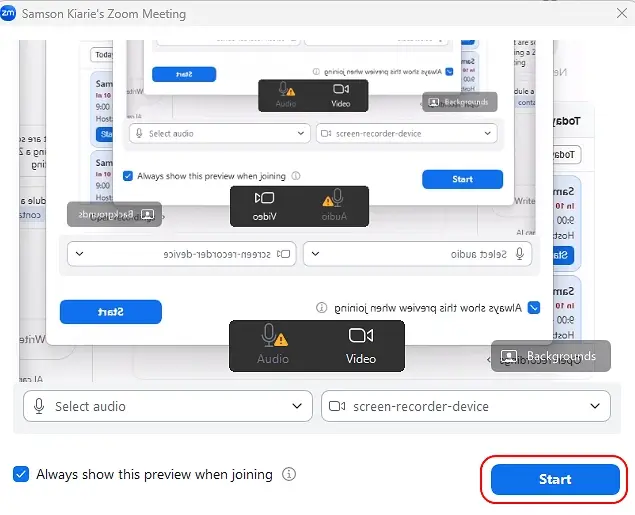
Step 2: Start meeting
In the pop-up window, click “start” at the bottom right corner to start the meeting.
How to Join a Zoom Meeting
You can join a Zoom meeting via a meeting link or a meeting ID.
Join using a meeting link
Step 1: Locate meeting link
Locate the Zoom meeting link sent by the meeting host via email, calendar invite, or chat. Click on the Zoom link or paste it into your web browser to join the meeting rooms.
Step 2: Join via Zoom Workplace app
A dialogue box will pop up with the option “Open Zoom Meetings.” Clicking this option will automatically redirect you to the Zoom Workplace app. Click “Start” in the meeting window to join or start the meeting.

Step 2: Join from your browser
Alternatively, if you’re having issues with the Zoom Workplace app or haven’t downloaded it already, you can join the meeting via browser. Zoom works seamlessly with any internet-enabled browser, such as Chrome, Firefox, and Edge,among others.
Simply click or paste the link into your web browser. Click the “Join from your browser” option at the bottom of the meeting page. Then, click the “use microphone and camera” on the dialogue box to join the meeting.
Note: The “Join from your browser” option will only be available if the meeting host has enabled it. Additionally, you can access some advanced features, like a Zoom Room and screen share, when you join a meeting from a browser.
Join using a meeting ID
You can also join a meeting in Zoom using the meeting ID shared via the invite email or message. For these steps, I joined the meeting via the desktop app:
Step 1: Launch the Zoom app
Open the Zoom app on a desktop or mobile device, and click or tap the blue “Join” button. This will open the “Join Meeting” tab.
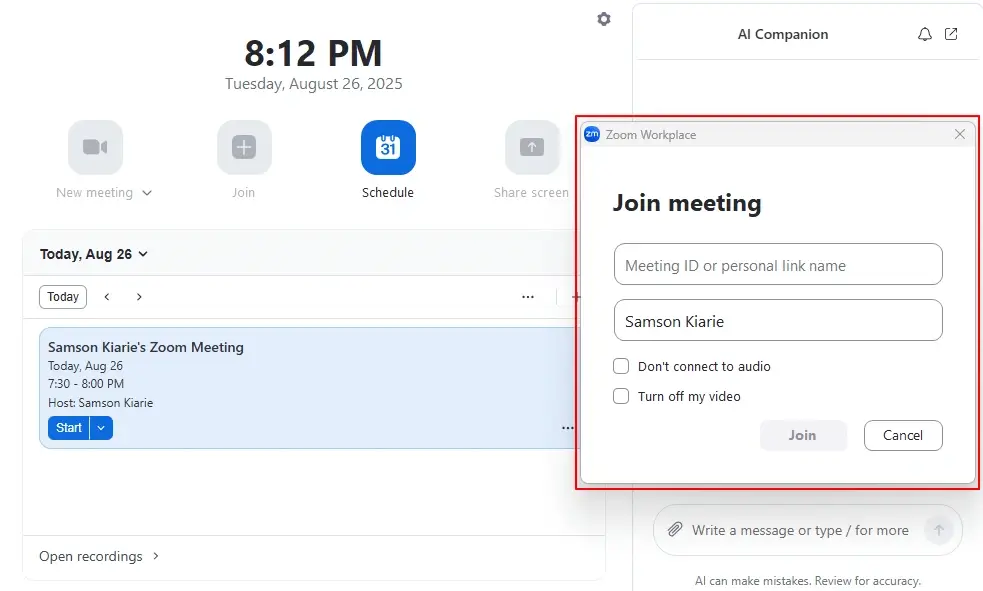
Step 2: Add the meeting details
Paste the meeting ID in the respective box, add your display name, and click “Join”. This is the name that will be displayed to other meeting participants. If you’re attending a business or official meeting, stick to your official name.
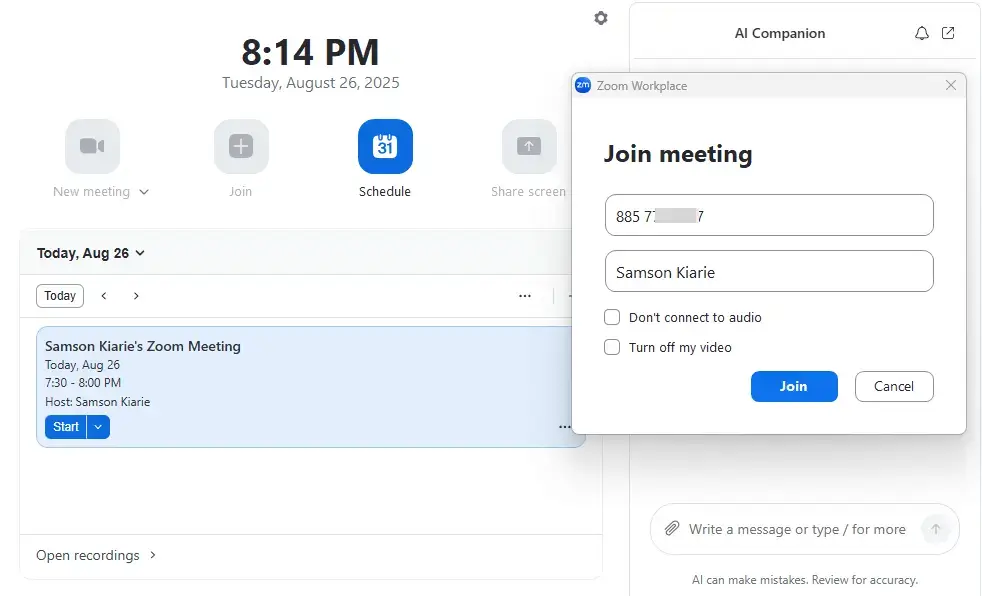
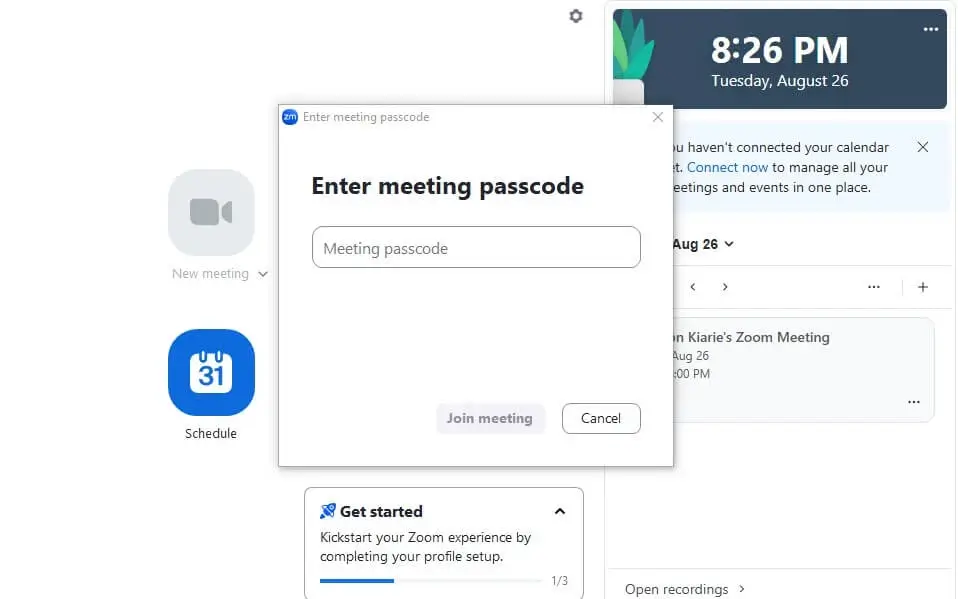
Step 3: Add meeting passcode
In the next window, add the meeting passcode and click “Join Meeting.” When prompted, click “Join” to join the meeting. The meeting host doesn’t need to enter the passcode to start the meeting.
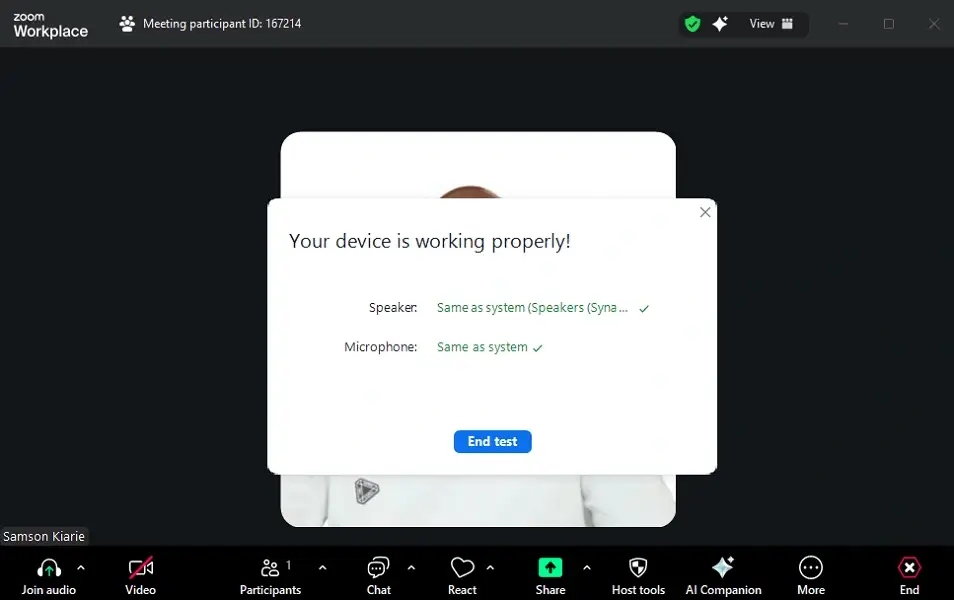
Step 4: Set up audio and video
Before joining a meeting, click “Test speaker and microphone” and follow along with the testing wizard to ensure they are working properly.
Step 5: End meeting
Click the “End” button at the bottom right corner, and select “Leave meeting.” The meeting host has the option to “End meeting for all.”

How to share a screen during a Zoom meeting
Screen sharing in Zoom lets participants view the same content in real time, making explanations clearer and discussions more focused. It’s especially useful for presentations, training, and collaboration, as everyone can follow along without confusion.
You can share your entire desktop, a specific app, or a browser tab. Moreover, Zoom lets one participant share the screen at a time or multiple participants to share screens simultaneously. Follow these steps to share your screen:
Step 1: Join a Zoom meeting
Join a meeting using one of the methods above. At the bottom of the Zoom meeting window, find and click the green “Share” button.

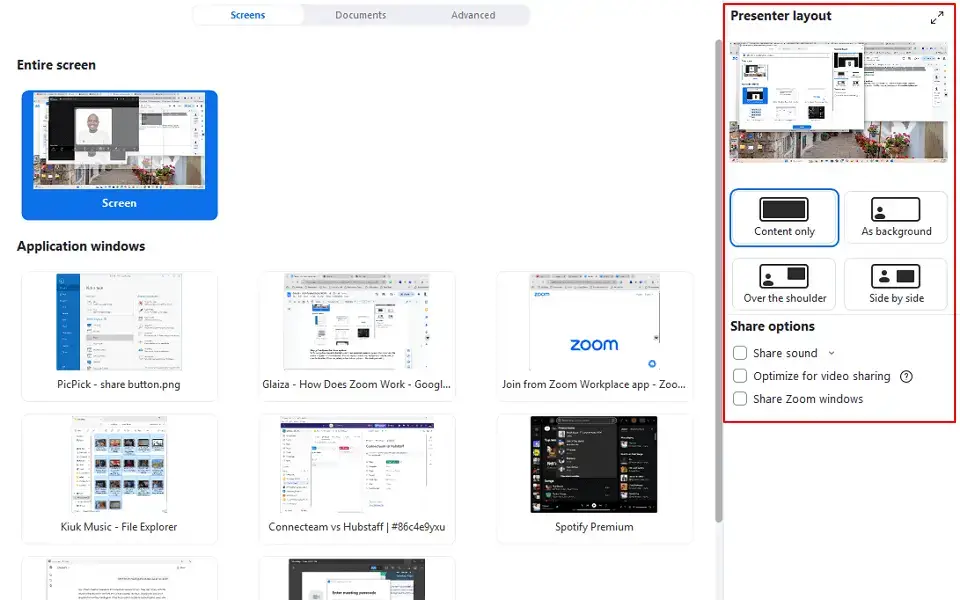
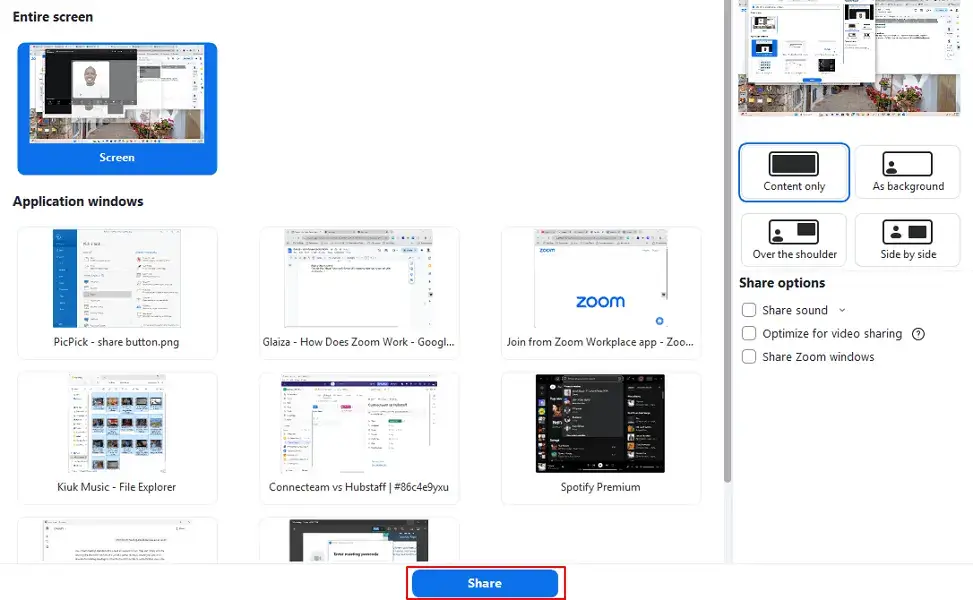
Step 2: Choose what to share
A window will pop up showing screen sharing options — entire desktop, a specific application window, or a browser tab.
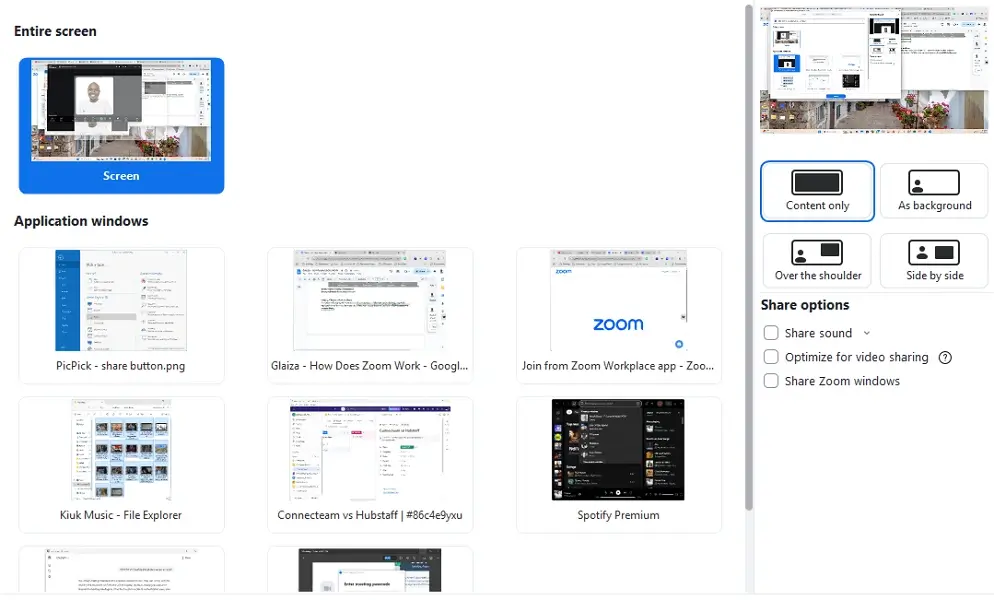
Step 3: Configure the share options
In the navigational panel to the right, select your preferred presenter layout or how you want the screen to appear to other attendees. You can display content only, background, side-by-side, or over the shoulder. Moreover, select preferred share options — like sharing sound, optimizing for video sharing, and sharing Zoom windows.
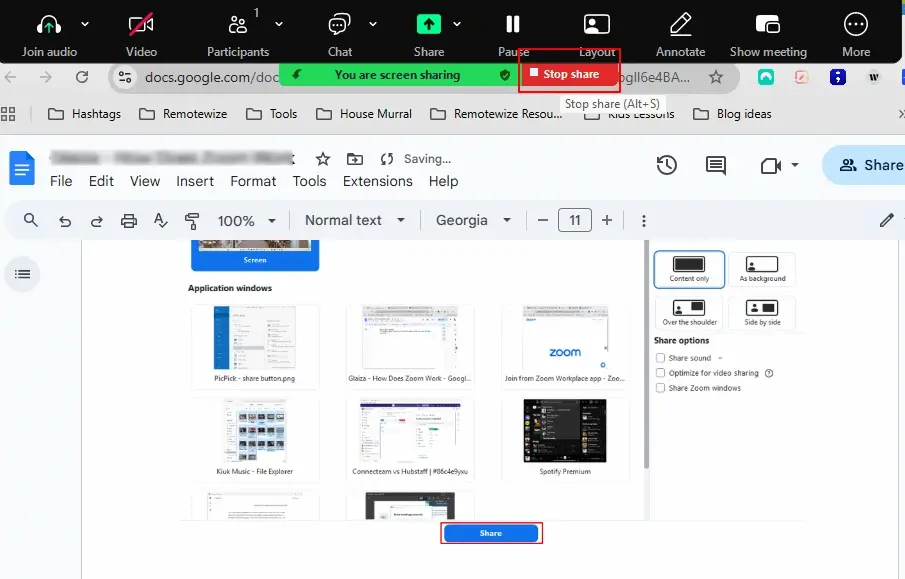
Step 4: Share screen
Click the blue “Share” button at the bottom of the screen to share your screen with other participants.
Step 5: Stop sharing
Once done, click “Stop share” at the bottom of your screen to end the presentation.
How to record a Zoom meeting
Record your Zoom meetings to capture important discussions and review them anytime.
Recording a Zoom Meeting on Mobile (iOS and Android)
For this guide, I recorded a meeting on my Android smartphone:
Step 1: Start or join a Zoom meeting
Open the Zoom mobile app and enter the meeting as the host or as a meeting participant with permission.

Step 2: Open the toolbar
Tap anywhere on your smartphone screen once to open the toolbar at the bottom.

Step 3: Select Record
Swipe the toolbar’s options to the left and tap “record.” In the pop-up dialogue box, tap “start recording” to record the meeting. You’ll get a voice notification when the recording starts. An icon will appear in the top left corner to signal that the recording is in progress.

Step 4: Stop recording
Once you capture the section of the meeting that matters, tap the record button in the toolbar to get options to pause or stop recording. In the dialogue box, click “Stop” to end recording. You’ll then get a voice notification that you’ve stopped recording.

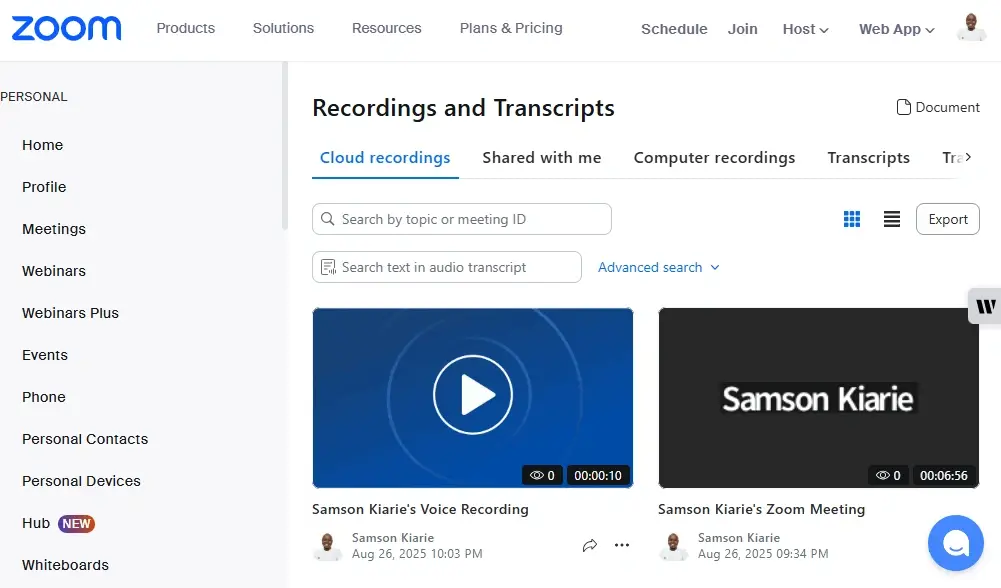
Step 5: Access your recording
Zoom stores meeting recordings in the cloud. You’ll get an email notification (with a link to the cloud storage) when the recording is ready. You can access the recording under the “Recordings and transcripts” section in the Zoom web portal.
How to Record a Zoom Meeting on Desktop
Step 1: Start or join a Zoom meeting
Open the Zoom Workplace app and join the meeting as the host or a participant with recording permission.

Step 2: Locate the Record button
At the bottom of the Zoom toolbar of the platform’s window, click the More button. Hover the cursor over “recording” and choose either “record to this computer” or “record to the cloud.”
Step 3: Start recording
You’ll be prompted to choose whether to record with or without recording. Choose your preferred option to start recording the meeting. You’ll see a visible indicator showing that audio and video are being captured.
Step 4: Stop or pause recording
You can pause or stop the recording using the options at the top right corner.

Step 5: Access your recording
If you recorded the meeting to the cloud, you’ll receive an email notification when the recording is ready. You can access the recording under the “Recordings and transcriptions” section.

Using Zoom Advanced Features
Zoom goes beyond video calls and screen sharing by offering advanced features that transform team collaboration. Breakout Zoom rooms enable focused discussions, video Webinars support large-scale presentations, and Zoom Phone ensures seamless calling.
Explore these tools to unlock Zoom’s full potential and elevate every meeting.
How to use Zoom breakout rooms
Zoom breakout rooms let hosts split a meeting into smaller sessions for focused collaboration. It boosts engagement, interaction, and productivity with easy participant assignment, host monitoring, and support for group meetings, work, training, and brainstorming.
Step 1: Start a Zoom meeting as the host
Open Zoom and begin your meeting as a host or co-host. Remember that only hosts and co-hosts can create and manage breakout rooms.

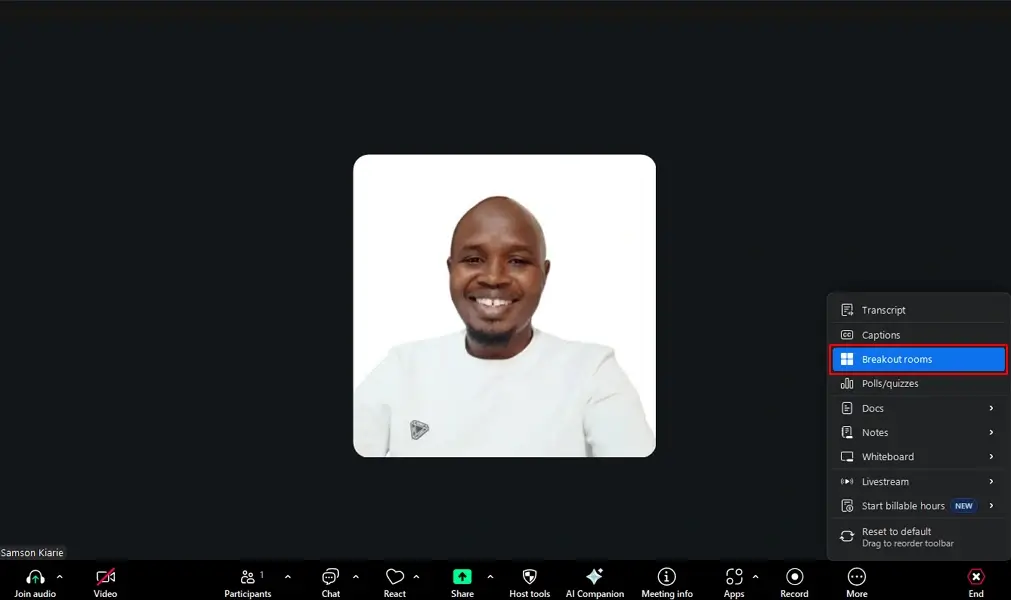
Step 2: Access the breakout rooms feature
To access the breakout room feature, you must first enable it on the Zoom web portal. Once enabled and the meeting is in progress, click “more” in the navigation panel at the bottom and select “ Breakout rooms.”
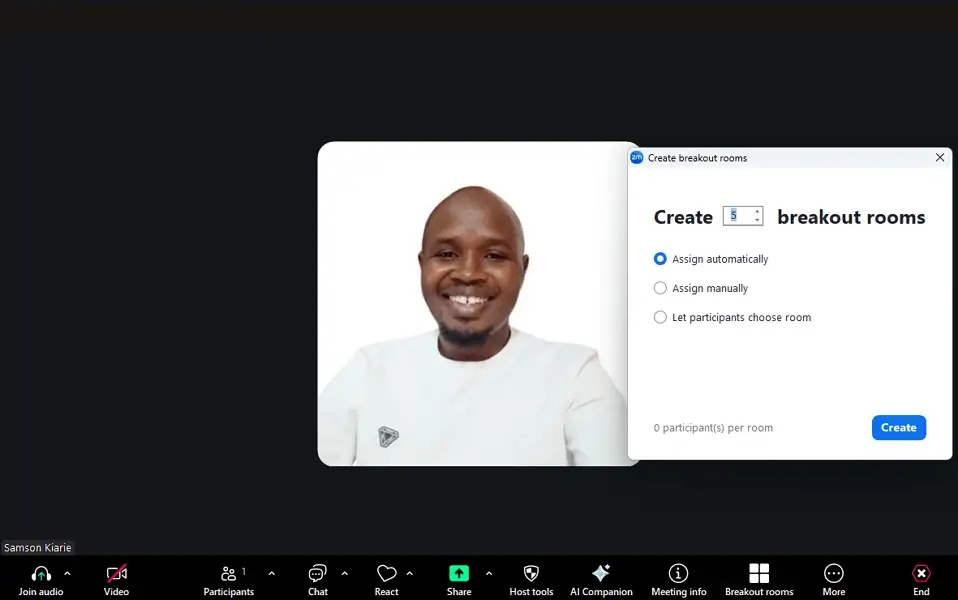
Step 3: Create breakout rooms
Clicking “Breakout rooms” opens a pop-up window with options to create breakout rooms. Choose the number of breakout rooms (up to 50), assign them to meeting participants automatically, manually, or let them choose. Click “Create” to add the breakout rooms.
Step 4: Rename breakout rooms
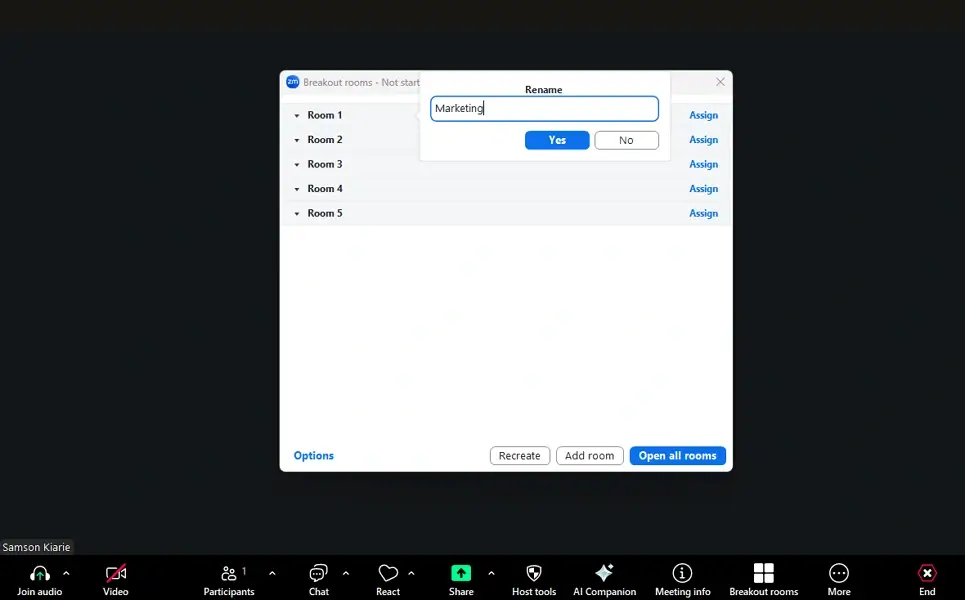
Zoom will automatically generate breakout rooms labelled with numbers. You can rename breakout rooms to make it easier for participants to choose. Hover the cursor over any room and click “Rename.” Add the preferred name and click “Yes.”
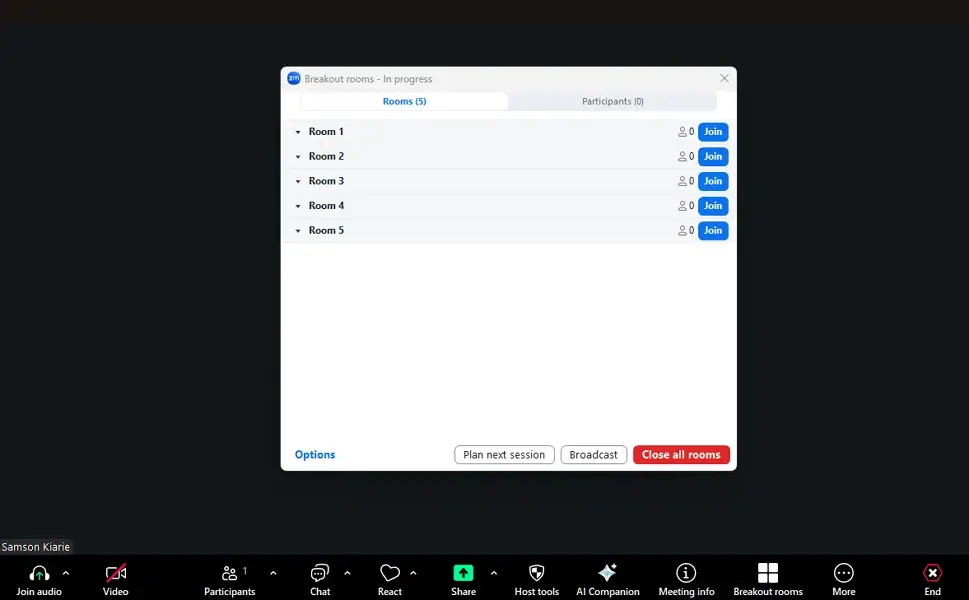
Step 5: Open breakout rooms
Click “Options” to find advanced customization options. Once everything suits your preference, click “Open all rooms” to create breakout rooms. Meeting participants will join breakout rooms based on the preconfigured settings.
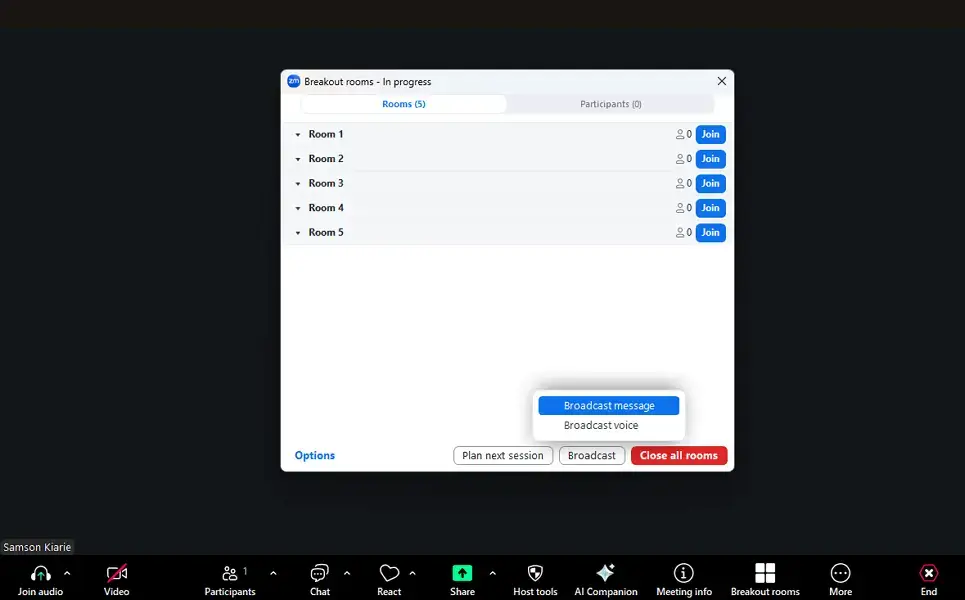
Step 6: Broadcast messages
To communicate with all breakout rooms at once, click “Broadcast” and choose to either broadcast a text or voice message to all breakout rooms.
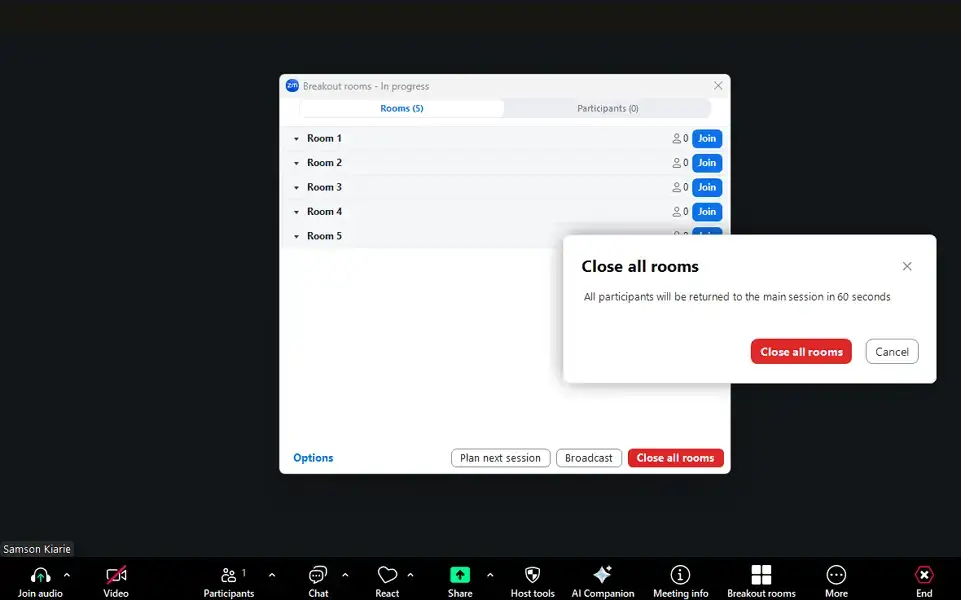
Step 7: Close breakout rooms
When sessions are finished, click Close All Rooms to bring everyone back to the main meeting.
Zoom Phone
Zoom Phone is a cloud-based phone system that replaces traditional desk phones. It allows Zoom calls from computers or mobile devices within the same Zoom interface used for meetings and chats.
Zoom Phone streamlines communication with features like call routing, voicemail transcription, call recording, and CRM or helpdesk integrations. Being cloud-based, it enables secure, reliable communication for remote and hybrid teams without costly hardware. Zoom Phone is ideal for any business, especially remote teams wanting to unite phone calls, video, and messaging to work better and save money.
Zoom AI Companion
Zoom AI Companion is an AI-powered assistant within Zoom that uses advanced language models to automate meeting tasks. It generates summaries, identifies action items, schedules follow-ups, drafts emails or chat messages, transcribes conversations, and organizes tasks in real time.
Zoom AI Companion benefits busy professionals, team managers, and frequent meeting hosts by improving productivity, collaboration, and task organization. Zoom users can summarize meetings, assign action items, schedule meetings, draft communications, transcribe discussions, track project updates, generate report content, and prioritize tasks —all without leaving Zoom.
Zoom Meeting Best Practices: Keep Meetings Safe and Enjoyable
As more people use Zoom for work, school, and connecting, it’s important to keep meetings safe and smooth. Follow simple tips to protect privacy, keep conversations engaging, and ensure a positive experience, whether you’re hosting the meeting or joining it.
Test the camera and mic before joining a meeting
Before joining a Zoom meeting, quickly test your camera and microphone to avoid glitches and ensure clear communication. This check helps you fix lighting, remove distractions, and adjust audio before others notice any issues.
Zoom lets you preview and adjust your settings in the app. You can switch mics, change volume, or find the best camera angle. With this small step, you can boost confidence, prevent delays, and show respect for others’ time, making way for smooth and professional conversations.
Give participants a heads-up when you schedule a meeting
Give participants an early heads-up so they can block their calendars, prepare materials, and test their tech before their upcoming meetings. Include the agenda, meeting length, and any pre-meeting tasks to set clear expectations and boost engagement.
By notifying participants ahead of time, they feel valued and ready to contribute. Prepare them in advance for a productive, respectful, and well-organized meeting.
Stay on Mute — Until It’s Your Turn to Shine
To keep Zoom meetings smooth and distraction-free, stay on mute until it’s your turn to speak. By staying on mute, you can cut background noise like typing, coughing, side conversations, or pet sounds that can disrupt focus and make it harder for others to hear the speaker.
Muting when not speaking also creates a professional atmosphere where every voice is clear and the discussion stays on track. Be mindful about when to unmute to respect both the speaker and the meeting’s purpose. Give each participant their moment without competing sounds, and when it’s your turn, your message will come through loud, clear, and impactful.
Inform participants before recording a meeting
Tell participants before the Zoom meeting recording to respect privacy and meet legal or company requirements. This way, you can set clear expectations and give anyone who is uncomfortable a chance to speak up or opt out.
Be upfront to build trust and let people focus on the discussion instead of worrying about surprise recordings. Remember, a simple heads-up shows professionalism and creates open communication.
Enable privacy settings to thwart Zoom bombing
Zoom offers built-in privacy settings to protect meetings from disruptions like Zoom bombing. With features that include waiting, video conference rooms, meeting passcodes, and host-only screen sharing, only invited participants can join and interact.
Activate these tools to safeguard sensitive information, prevent interruptions, and gain access to meeting settings and actions. Use this proactive approach to keep virtual meetings secure, professional, and focused.
Wrapping Up: Master Zoom and Make Every Meeting Count
Using the Zoom platform well isn’t just about clicking “Join.” It is about making the most of its tools to stay connected, productive, and professional anywhere. You can schedule meetings, screen share, use Zoom breakout rooms, record sessions, and more to make teamwork smooth and effective.
With a little practice and planning, you will be running meetings like a pro who saves time and improves communication with the team or clients.
As remote work and virtual events continue to grow, Zoom remains the top choice for millions worldwide. From an individual, small business, or large company, there is a plan built for you. Zoom’s features scale with your needs to help you lead meetings confidently and creatively.
Experience the Zoom difference, explore plans, try the Zoom free account version trial, and see how it can transform the way you collaborate. Happy Zooming!
FAQS
How do I use Zoom for the first time?
Sign up for a Zoom user account, download the app on your device, and join or start a meeting using the meeting ID or join link.
What happens if you go over 40 minutes on Zoom?
The Basic plan or free version automatically ends the meeting after 40 minutes, and you will need to start a new meeting to continue.
Can everyone see you in a Zoom meeting?
Only if your video is turned on; participants can’t see you if your camera is off.
Do I need to install Zoom to join a meeting?
No, you can join meetings via a web browser, but installing the app provides additional features and better performance.